VW Transporter/Multivan T4 2.5TDI ACV 75KW 1997 repair
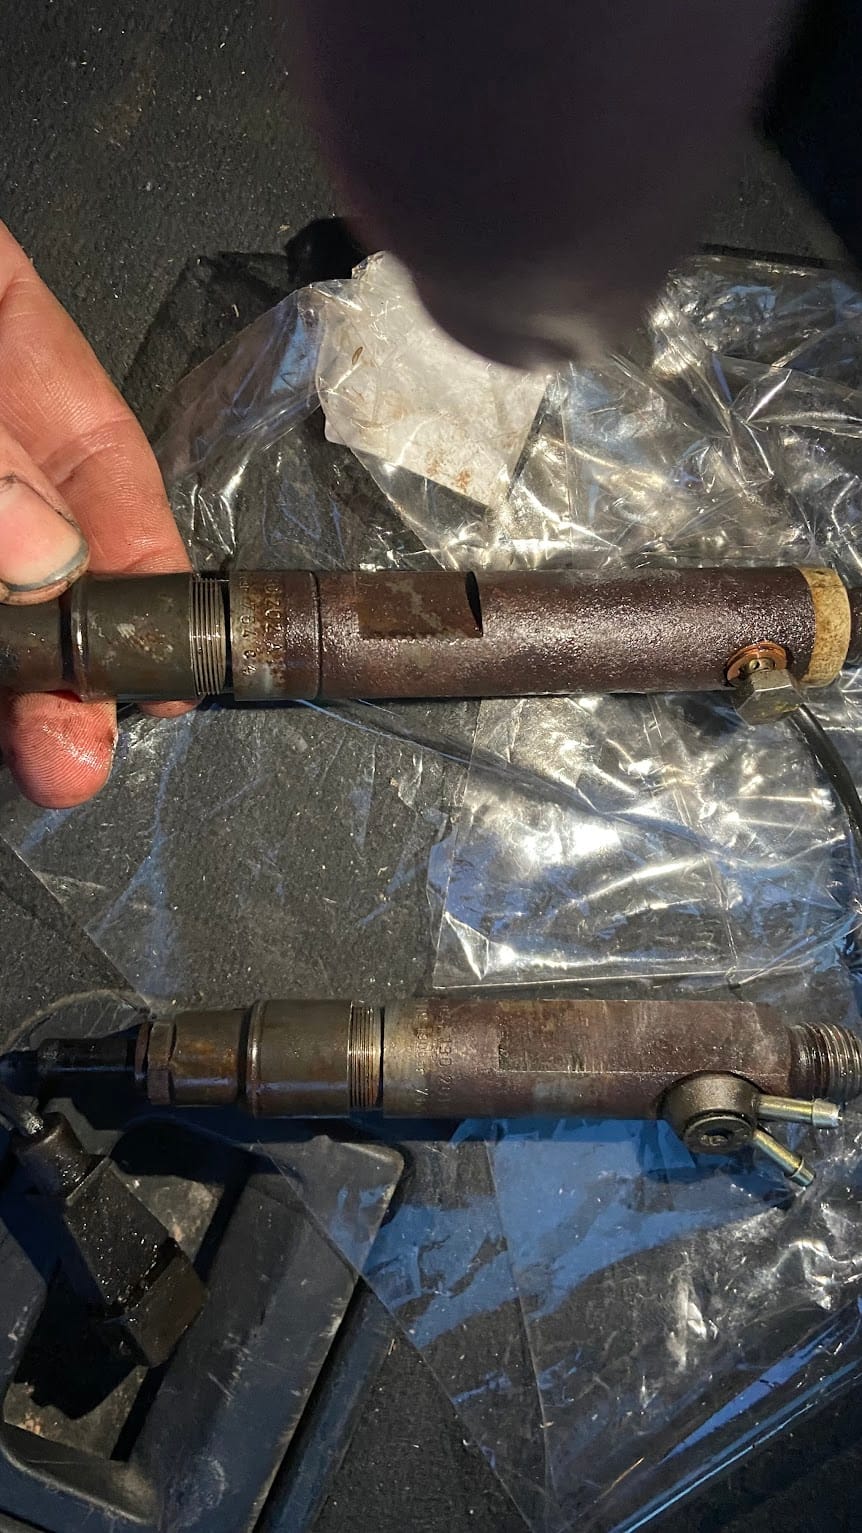
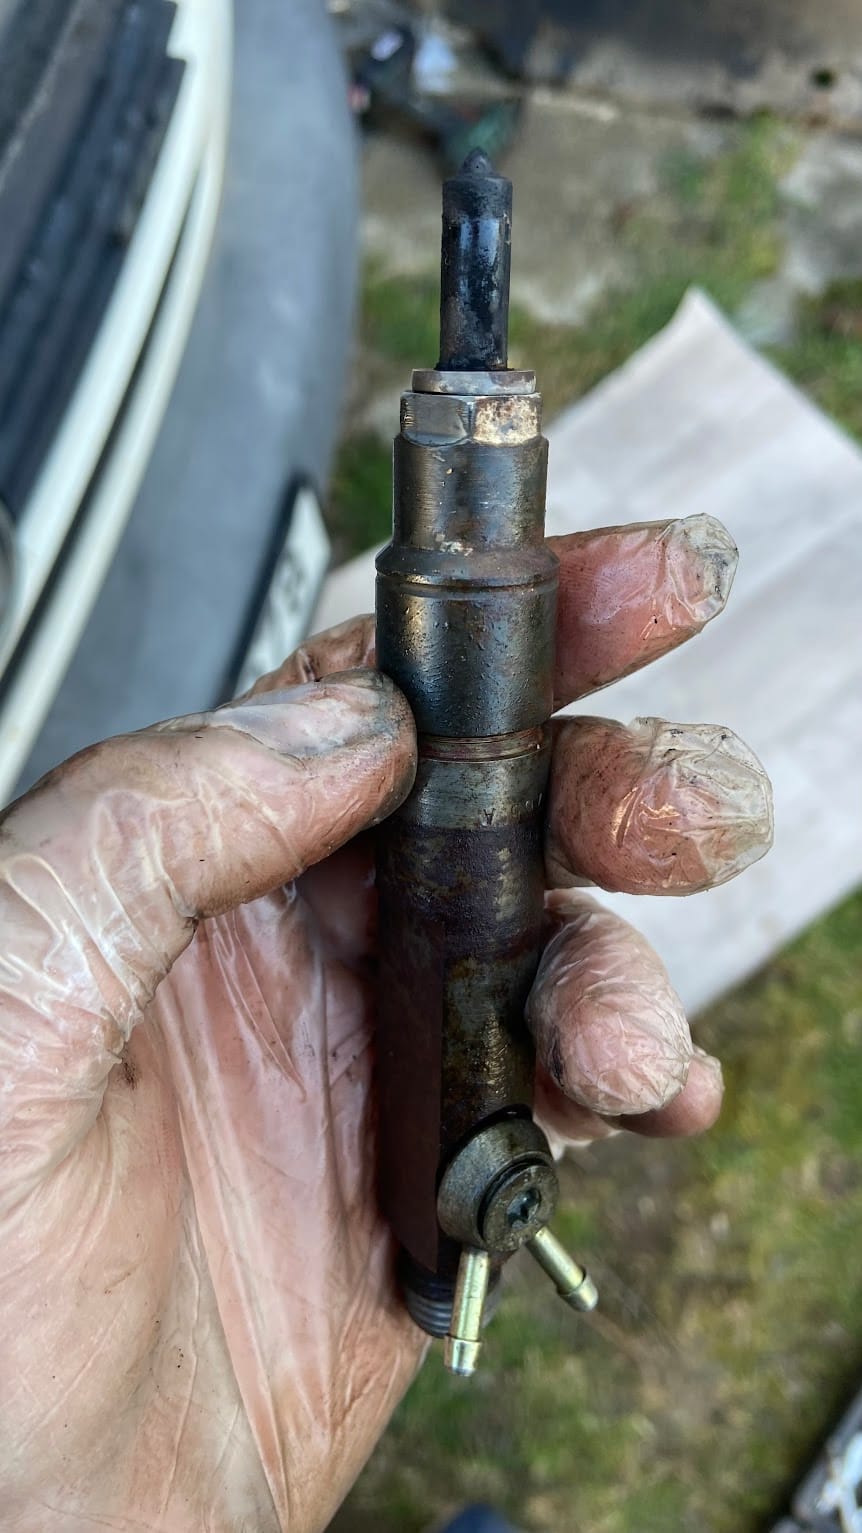
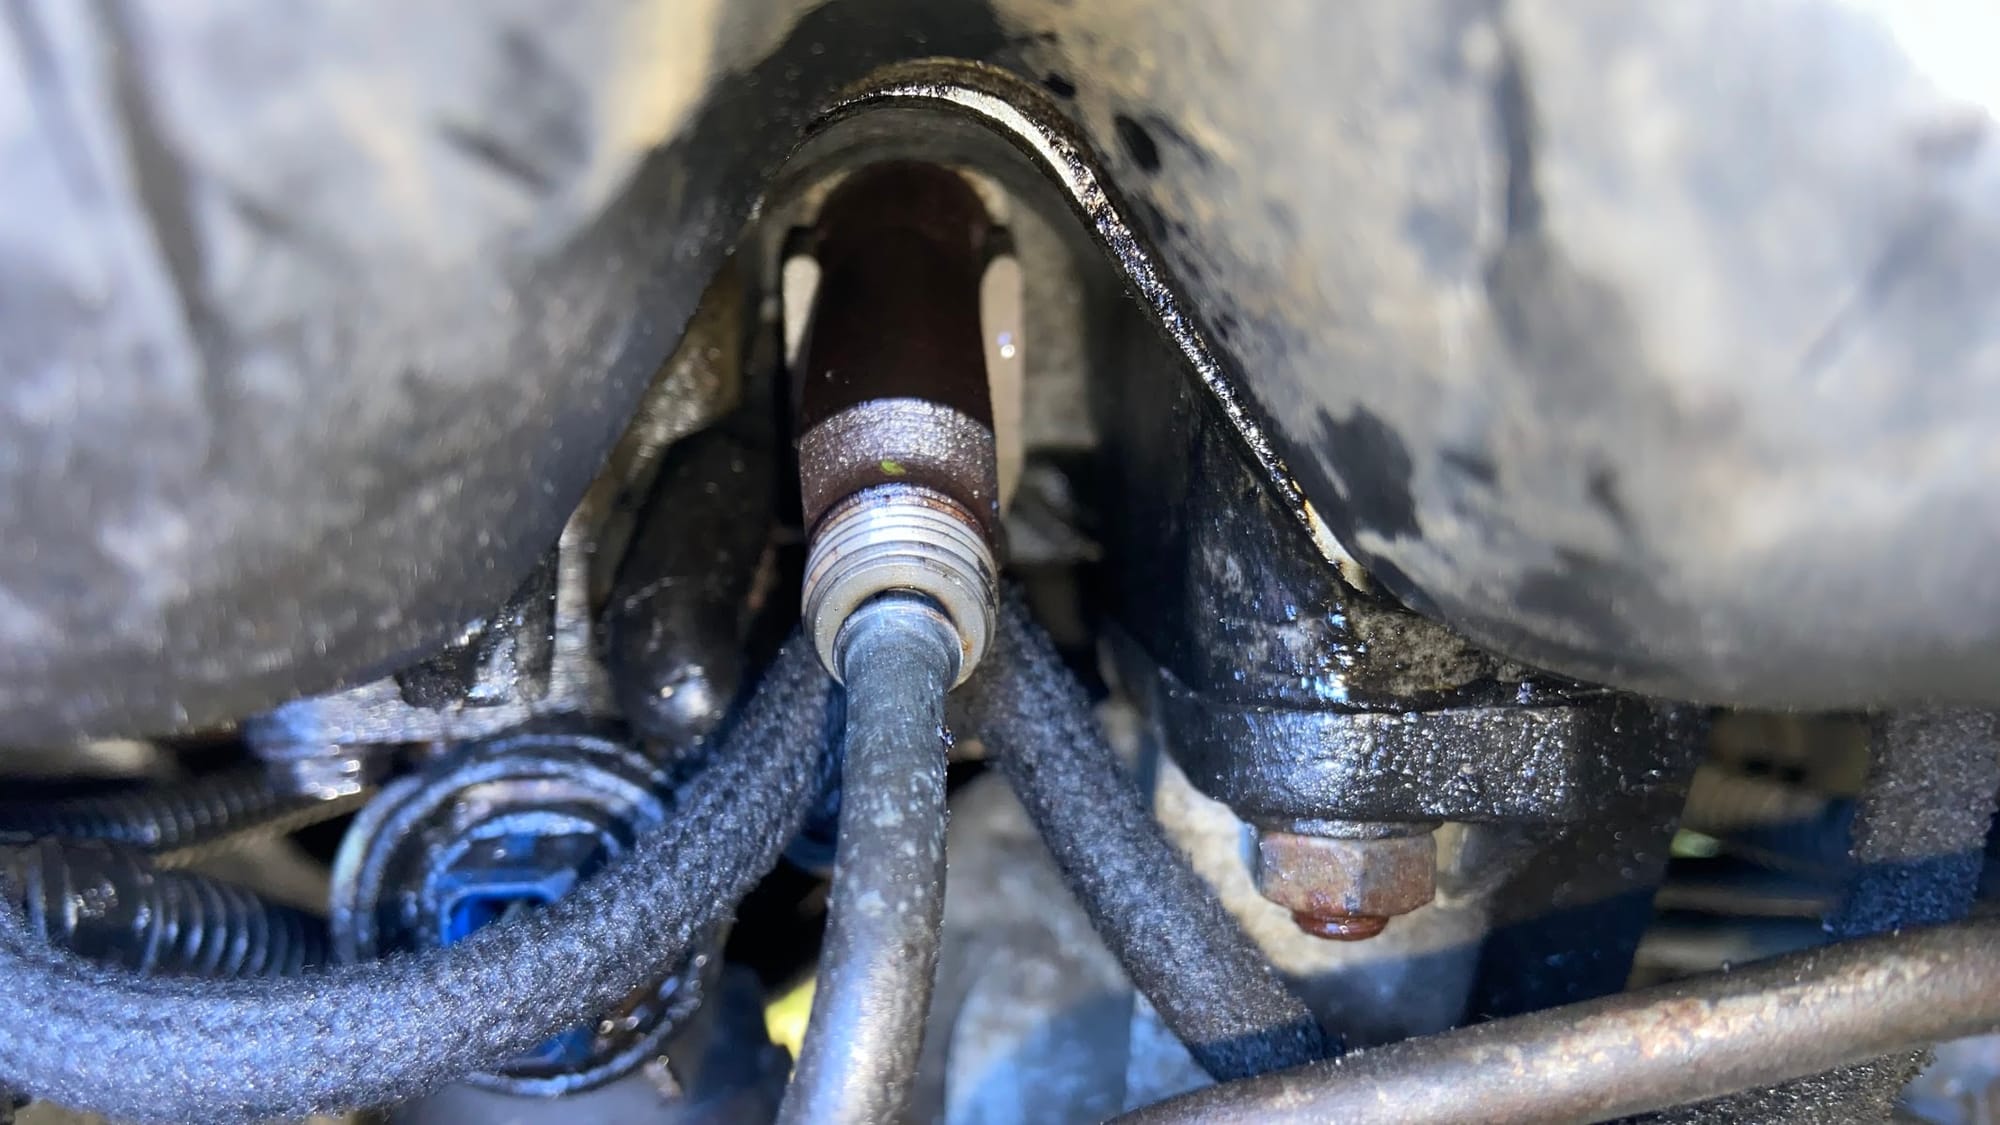
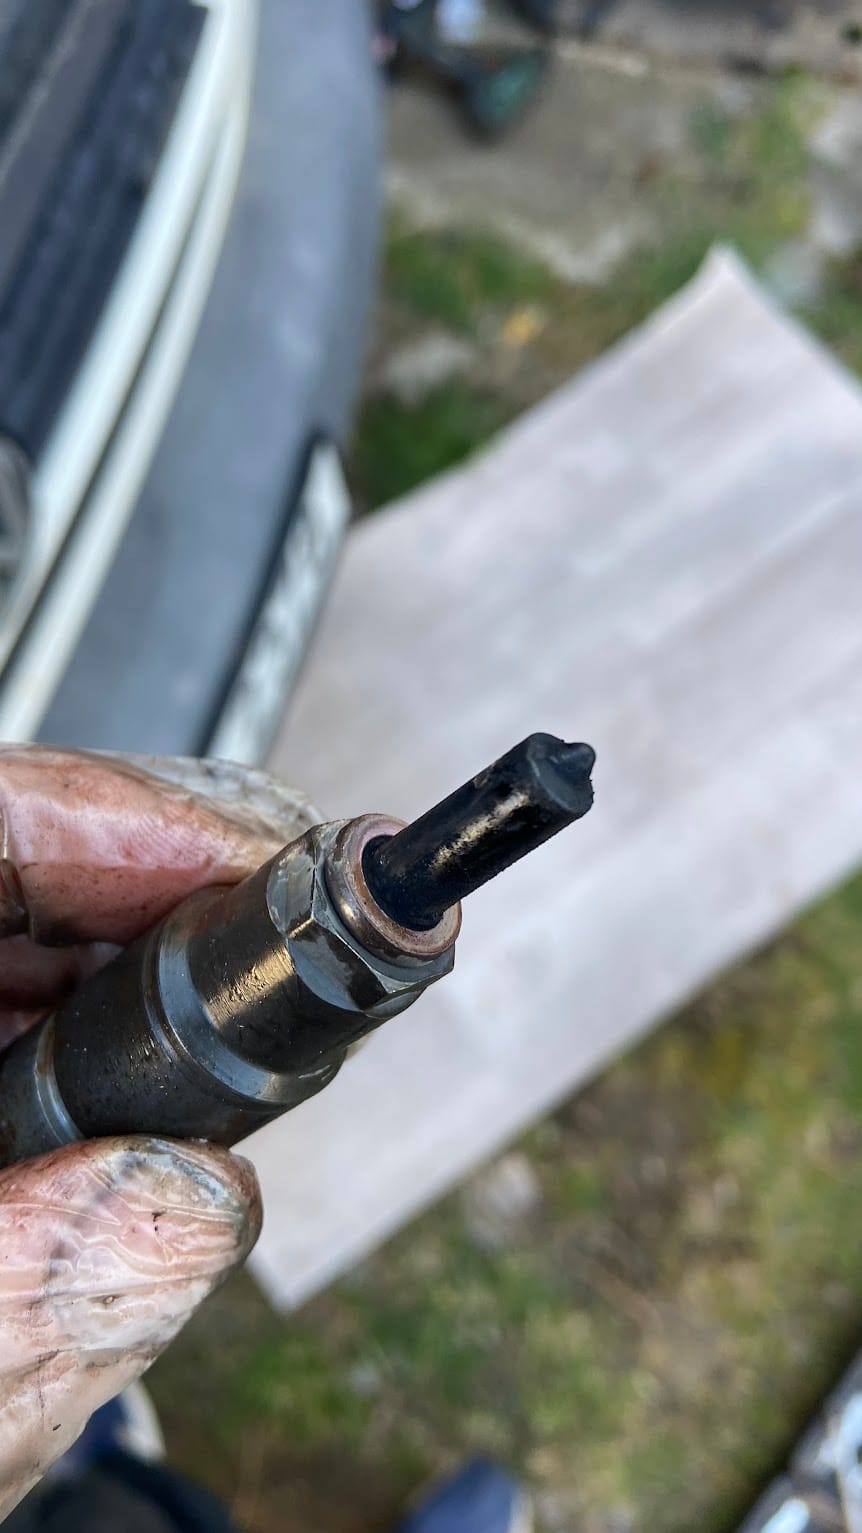
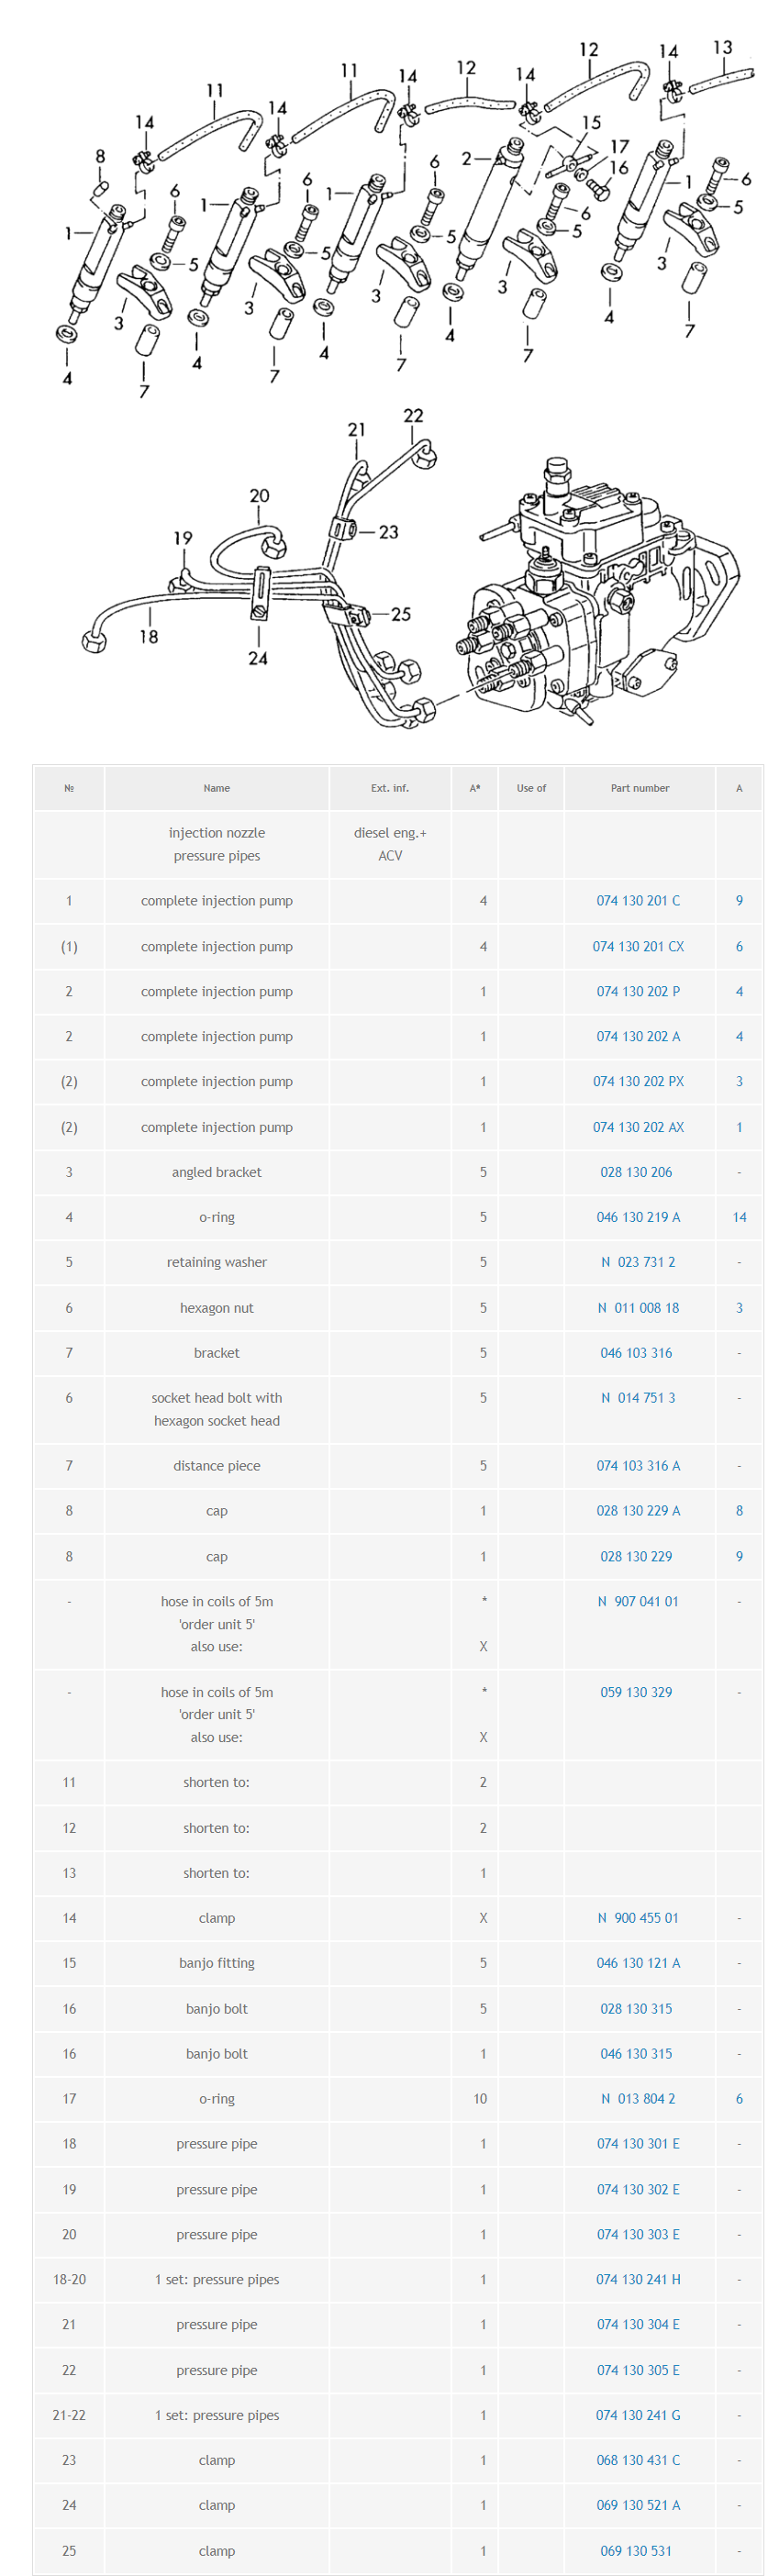
Fuel Injectors
- 4x Injector: 074130201C (074 130 201C)
- 1x Injector with diag: 074130202A (074 130 202A)
Refurbish parts
- 5x Fuel Injection Nozzle Sprayer type 0,185mm (PL manufacturer Wuzetem aka WZM): DSLA150P442 (DSLA 150 P 442, 0 433 175 072, 0433175072, 2437010076, 2 437 010 076, PDSLA150P442, ALLA150P442, ASLA150P442)
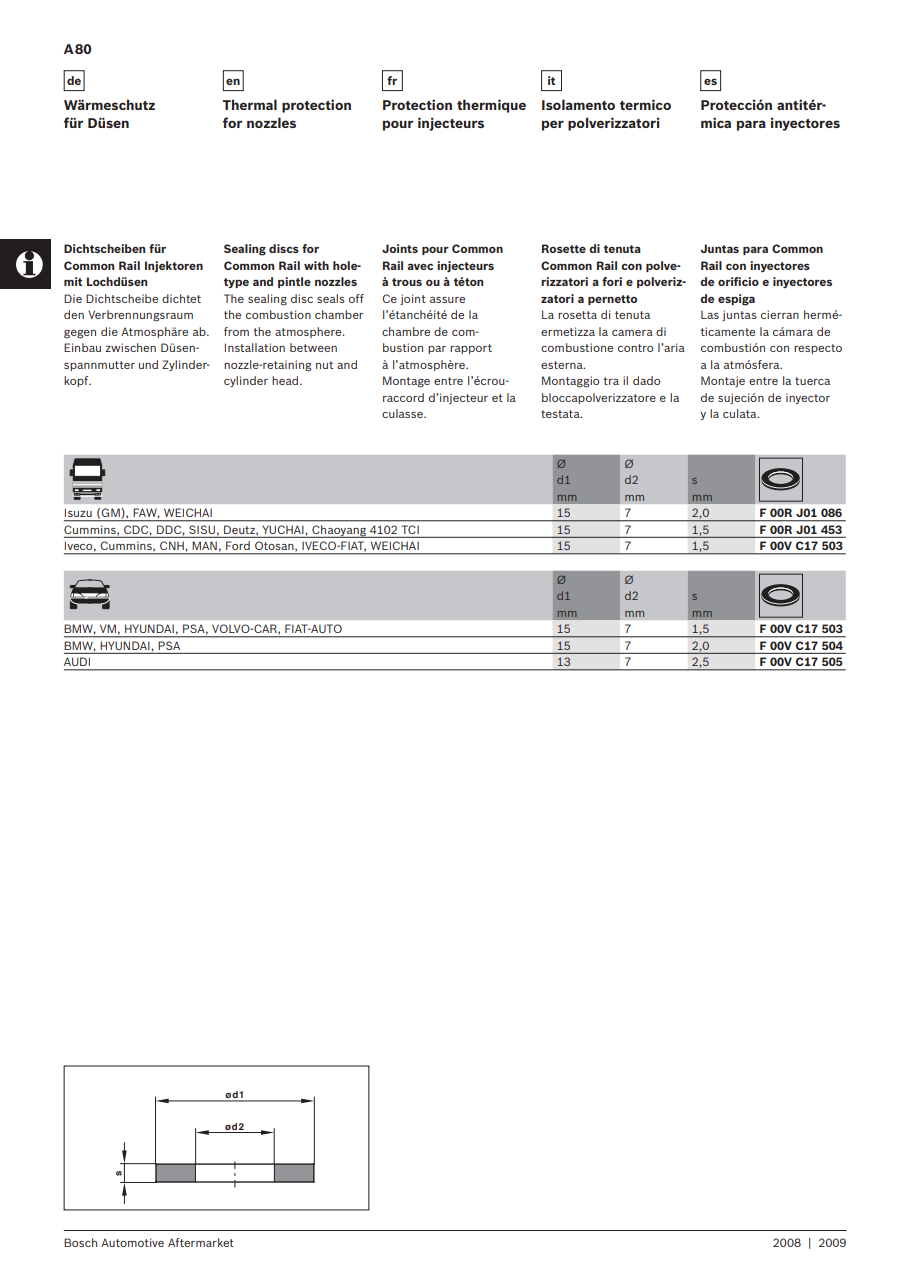
- 5x Nozzle ring BOSCH F 00V C17 505 (046 130 219 A, 057 130 219 A) - inner Diameter ~7,1-7,7mm, Thickness 2,5mm!!, Diameter 13mm
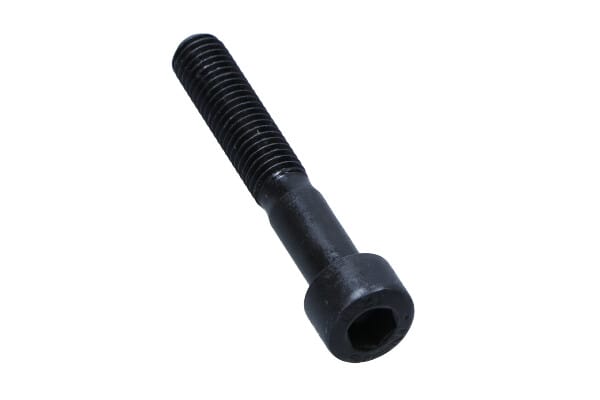
- 5x Injector holder bolt N0147513 (M8x50 Allen key) S12.9 S10.9
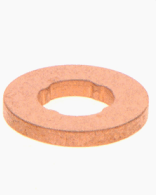
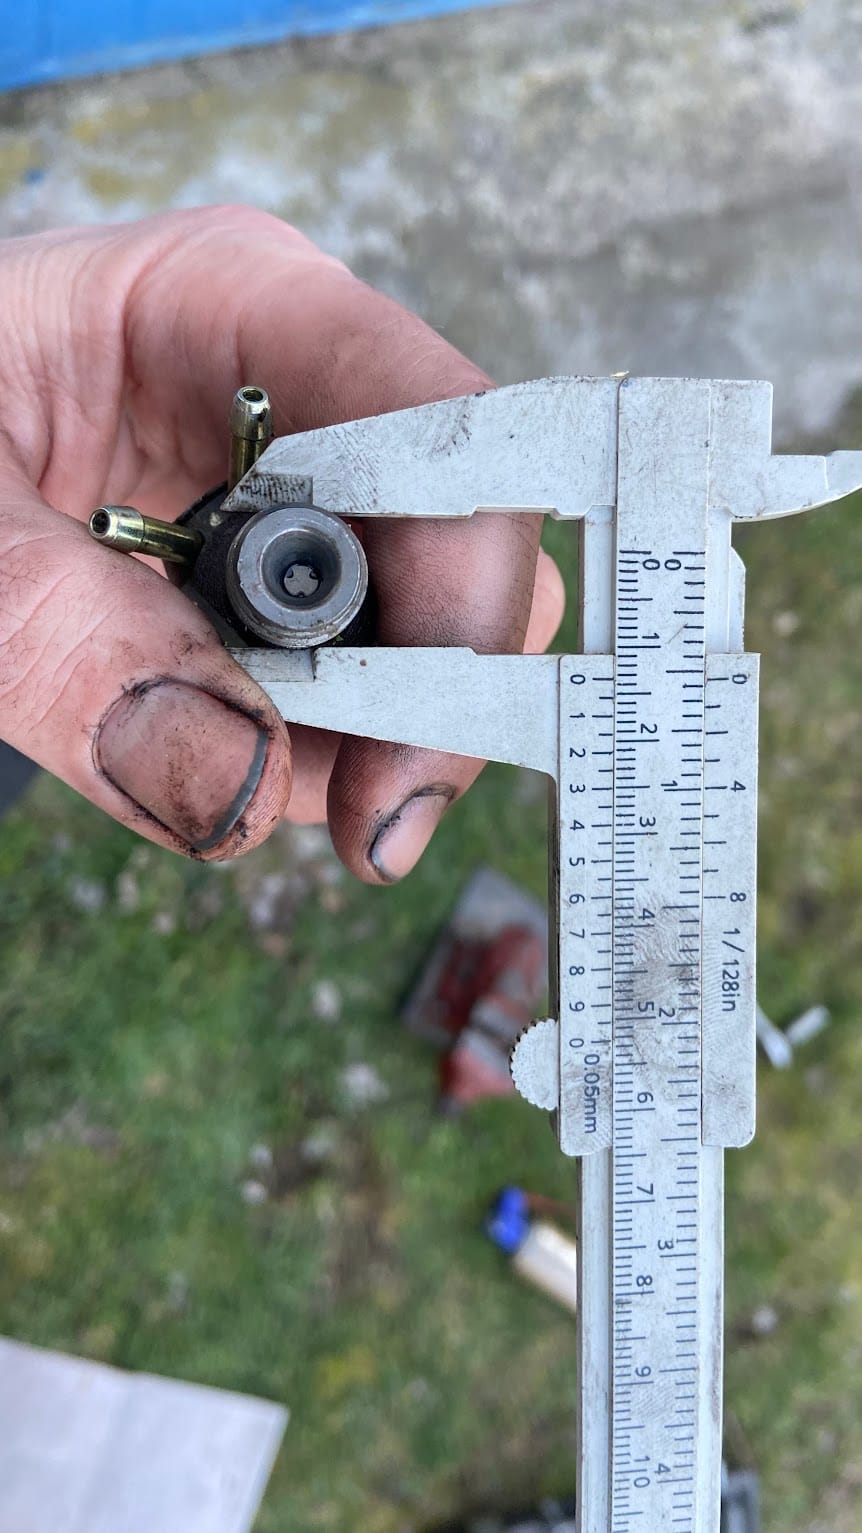
- 5x hose 3.5mmx2mm (N910 286 12, 005 311 342, 005 311 343, 005 312 584, 047 129 487, 047 129 488, 047 129 488 A, 047 133 990, N020 353 27, N020 353 5, N900 496 03, N900 496 06, N900 496 15, N900 496 29, N02035327, N0203535)
- 5mmx3mm N0202821
- 5mmx2.5mm N0180466 (Cruise Control Vacuum Harness)
- 3.5mmx3mm N0202911
https://cardiagn.com/volkswagen-transporter-1991-1996-workshop-manuals-wiring-diagrams/


Volkswagen T4 Multivan Motor ACV 75KW 2.5TDI 1997 injectors
BOSCH injectors
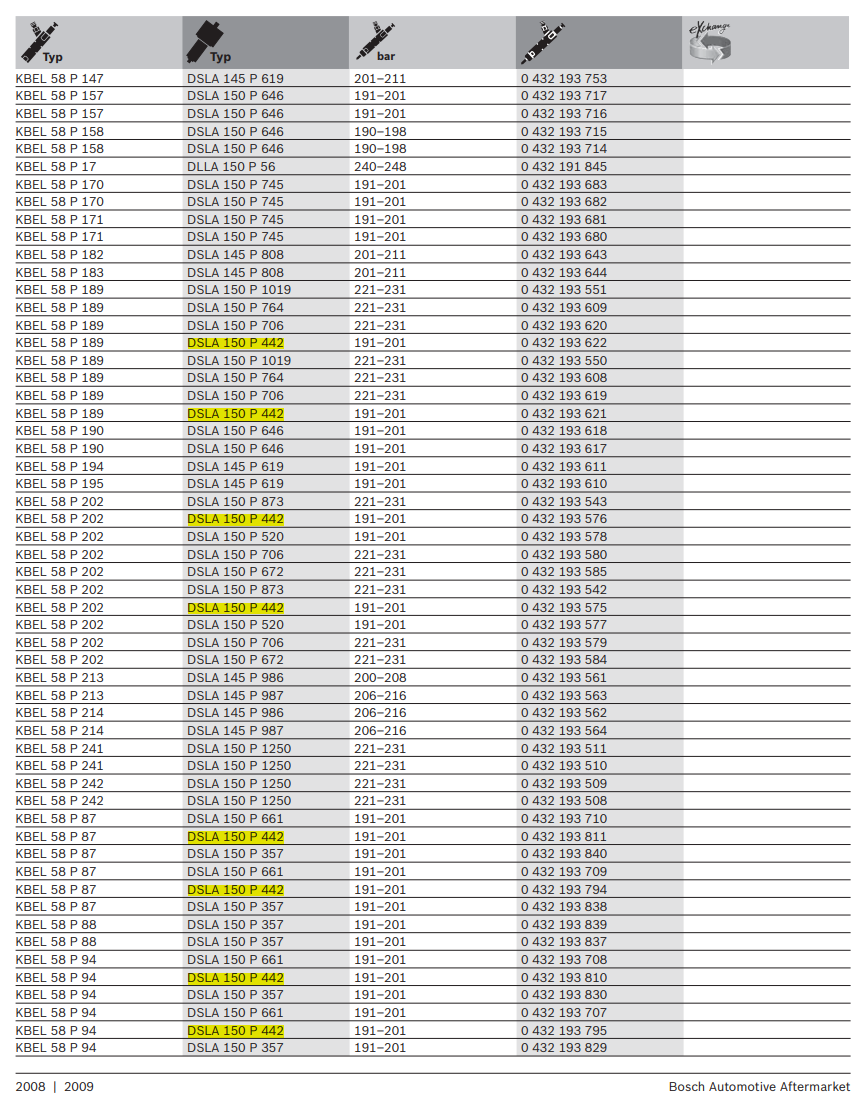
Alternative codes for injector nozzles
For Bosch 0 432 193 575 (0432193575)
0 432 193 576 (0432193576)
0 432 193 621 (0432193621)
0 432 193 622 (0432193622)
0 432 193 732 (0432193732)
0 432 193 733 (0432193733)
0 432 193 734 (0432193734)
0 432 193 735 (0432193735)
0 432 193 794 (0432193794)
0 432 193 810 (0432193810)
0 432 193 811 (0432193811)
0 432 193 823 (0432193823)
For VAG 028 130 201 Q (028130201Q)
028 130 201 R (028130201R)
038 130 201 F (038130201F)
038 130 201 FX (038130201FX)
038 130 201 G (038130201G)
038 130 201 GX (038130201GX)
038 130 202 (038130202)
074 130 201 C (074130201C)
074 130 201 R (074130201R)
074 130 202 P (074130202P)
Applications:
AUDI A3 1,9 TDI 66 (90 KM) 09/1996 – 08/2000 8L1 AGR, ALH
Audi 80
Audi 90
SKODA Octavia 1,9 TDI 66 (90 KM) 09/1996 – 12/2009 AGR
SKODA Octavia 1,9 SDI 50 (68 KM) 05/1997 – 07/2000 AGP 1U2, 1U5
SEAT Cordoba , Cordoba Vario , Ibiza , Inca | 1.9 SDI
SEAT Ibiza 1,9 TDI 66 (90 KM) 05/1999 – 05/2002 AGR
SEAT Toledo 1,9 TDI 66-81 (90-110 KM) 05/1999 – 12/2003 ASV, AGR
SEAT Leon 1,9 TDI 66-81 (90-110 KM) 10/1999 – 07/2004 ASV, AGR
SEAT Cordoba 1,9 TDI 66 (90 KM) 05/1999 – 12/2002 AGR
SEAT Leon 1,9 SDI 50 (68 KM) 12/1999 – 10/2003 AQM
Volkswagen Bora, T4, LT28, LT35, LT46, Golf III, Polo
VW Bora 1,9 TDI 66 (90 KM) 09/1998 – 05/2005 AGR
VW Golf IV 1,9 TDI 66 (90 KM) 10/1997 – 09/2002 AGR
VW Polo 1,9 SDI / TDI 47-66 (64-90 KM) 10/1999 → AGR , ASX
VW T4 2,5 TDI 75 (102 KM) 01/1995 – 06/2003 AXL,ACV, AYC, AUF, AHD,
VW LT 2,5 TDI 55-75 (75-102 KM) 04/1996 – 04/2006 BBE, APA, BBF, AGX, AHD, 2DA, 2DB, 2DC, 2DD, 2DE, 2DF, 2DG, 2DH, 2DK, 2DL, 2DM
Volkswagen Caddy , Golf III , Jetta , Polo , Vento | 1.9 SDI
Volkswagen Golf IIi AGR. (16), 1E2EK, 1E7, 1EADYK, 1EAGGK, 1H1, 1H2E, 1H5, 1HAAA, 1HAAZ, 1HABF, 1HABS, 1HADY, 1HADZ, 1HAGG
Volkswagen Transporter, T4
Seat (Leon, Toledo) 1.9 SDI/TDI,
Volkswagen (California, Caravelle, LT 28/35/46, Multivan T4, Transporter T4) 2.5 TDI,
LEON, TOLEDO, CORDOBA, IBIZA, 1,9SDI, 1,9TDI, 90KM
VW BORA, TRANSPORTER T4, LT,
AUDI A3, OCTAVIA, 2,5TDI, 1.9 TDI, 1.9SDI
DYNAMIC INJECTION TIMING ADJUSTMENT
on VW Transporter, Caravelle, Multivan - T4 2.5 TDI (engine) ACV) Class of 1995 – 2003 https://vwts.ru/forum/topic/155501/
The main sequence of works is suitable for VW T4 with ACV, AJT, AHY, AXG, AYC, AYY, AXL, AUF engines
.
Injection timing is an important characteristic of a diesel engine. An error in adjusting the angle can lead to an increase in fuel consumption, a decrease in power, burning of valves, a problematic start of a cold engine, smoke in the exhaust, etc.
There are two types of adjustment of the injection angle:
- static - with the help of a clock-type indicator (in order to start the engine)
- dynamic - with the help of diagnostic equipment (precise adjustment of the injection).
TOOL :
- screwdrivers
- 10, 13 head
- counter support
- 21 head + ratchet with extension
- diagnostic tool V.A.G 1552, VAS 5051, 5052, etc.,-COM
- diagnostic cable (or head)
TEST CONDITIONS:
- The battery voltage must be at least 11.5 V.
- The S102 fuse is working.
- The ground connections on the engine and gearbox are in good working order.
- Basic timing adjustment is done correctly.
- The engine is warmed up to a temperature of 85 degrees.
- All electricity and air conditioning are switched off.
PROCEDURE FOR PERFORMING WORK (step-by-step instructions):
- Turn on the diagnostic tool. In this case, the VAS 5052 A 2
was used. Connect the diagnostic cable (VAS 5054 diagnostic head) to the diagnostic connector located on the
steering column 3. Turn on the
ignition 4. On the display, select the "Vehicle Self-Diagnostics" field.
5. Select the vehicle system - "01-Engine Electronics", click "Next"
-
Select the "Fault Memory Polling" field, check for fault 7
. Delete all existing errors in the "01 - Engine Electronics" section. Get out of the field. -
Select the "Measurement Results" function.
From the drop-down menu, type group 01 and confirm entering Q ( read ) . -
The parameters of group 01, window 1-4 are studied here:
In window 4 of this group, you can control the real temperature of our engine.
If it is lower than the test conditions require (85 degrees), then start the engine and heat it up to the desired temperature.
-
During warm-up, the readings in the 4th window of the gr. 01 should be rising all the time, if they rise and fall in the range of 2-7 degrees, then there are questions about the 4-pin temperature sensor.
The fastest way to do it is to work incorrectly.
It must be checked and, if necessary, replaced, and only then continue the inspection.
If the temperature has reached 85 degrees, we leave the group. 01, to do this, press "Back". -
Enter the gr. 04, "Measurement Results" function.
The parameters of group 04, window 1-4 are studied here.
First of all, we are interested in windows 3 and 4, whichIt is necessary to control it.
In our situation, the picture shows that the installed injection is later than required (windows 2 and 3) and needs to be adjusted.
Let's get out of the gr.. 04. Click Back.
- Close the diagnostic program, turn off the computer and turn off the engine. Do not disconnect the diagnostic cable.
- Open the hood and prepare the engine compartment for adjustment work.
To do this, remove the lining, remove the intercooler bracket, tilt the radiator to the service position (without disconnecting the hoses).
Remove the protection of the injection pump belt, unscrew the 2 bolts securing the expansion tank, remove the chip from it and move it aside.
For convenience, tie the tank to the body.
DYNAMIC INJECTION CHECK AND ADJUSTMENT :
The start of injection should be checked and, if necessary, adjusted after each timing belt replacement, as well as after loosening the threaded connections of the injection pump or its pulley
-
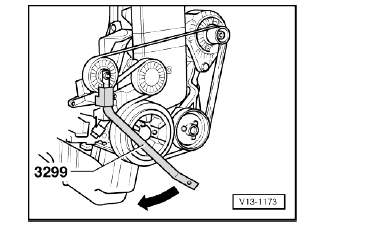
We check the correctness of the belt tension and the installation of two injection pump rollers.
-
The injection is adjusted by changing the position of the camshaft gear on the side of the injection pump relative to the camshaft itself.
I would like to note that according to the documentation for these cars, the manufacturer advises to adjust the injection by shifting the parasitic roller of the injection pump belt and the subsequent correction of the belt tension with a tensioner roller.
However, practice has shown that it is inconvenient to carry out such work in a hot engine compartment with a radiator installed. It is difficult to get the belt tension correctly and get the injection at the same time. Therefore, I adjust the injection of camshaft gears from the side of the injection pump and do not touch the rollers.
The power of habit plays a decisive role here, so we will consider this method below.
ATTENTION:
The dynamic injection start can only be checked and adjusted by activating the "BASIC ADJUSTMENT" function of the engine.
In the 000 group, in the basic settings (10 windows), all digits are shown in conventional units. Let's talk about this in more detail and study the data
table 3. Start the engine, turn on the diagnostic device and check the injection parameters.
- Select the "BASIC INSTALLATION"
function 5.From the drop-down menu, dial group 000 and confirm the input Q (read ).
- Out of 10 windows – we are interested in only three at the moment:
window 2 = 52 - perfect injection.
Window 7 = less than 80,
window 9 = above 120.
All digits in the 000 group windows are conventional units of measurement.
In our case, the injection is set later than the norm, because the figure in the window is 2 degrees 000 less than the ideal injection.
- Before you start adjusting, you need to learn, and most importantly, remember several important points:
a) - Turn the gear on the camshaft
: EARLIER - on yourself (counterclockwise) - the figure increases
LATER - away from yourself (clockwise).- the figure decreases
b) - To do this, unscrew the bolt using the counter support with a head of 21 with ratchet + extension cord.
c) - Turn the gear a fraction of a millimeter in the desired direction, tighten the camshaft bolt. The tightening force should be at least 100 Nm.
- After adjusting in window 2 - group 000, we will see the real injection and it is equal to =100 in our case. This means that the injection is
too early 9. Repeat the adjustment, i.e. exit the gr.. 000, turn off the engine, adjust the gear, start, enter the gr. 000 and check 10 windows again.
- 4 attempts were enough for me to get to the norm corresponding to the condition of this engine.
This concept means mileage, wear of the injection pump, cylinder head condition, compression, injectors, cyclic fuel supply, diesel fuel quality in the region, starting and travel conditions, time of year, etc.
I draw your attention to the fact that the difference in readings in window 2, gr 000 should not change more than 10 units (plus or minus 5). If the difference in numbers is more than 10, it is necessary first of all to check the tension of the timing belts and injection pump. Continue the measurements after checking the idlers.
In the following picture, you can clearly see the significant difference in the injection readings (window 2 group 000) in the different functions "Measured values" and "Basic settings" when the gear and timing belt are in the CONSTANT position.
Now we need to check the correctness of our actions.
-
Exit group 000 and dial group 04 in the "BASIC SETUP", confirm entering Q (read).
-
The injection timing control range is checked in the "Basic Adjustment" function group 04. In the indication field 3 of group 04, the extreme (earlier and later) values of the injection regulator can be read. The engine will change speed. Accordingly, the inscriptions will appear: sooner and later.
In "LATE" the specified range = 3.0- 5.0 degrees to TDC at 30-35%.
In "EARLY" - the specified range = 7.0 ... 9.0° to TDC at 75 – 85 %.
Later, it is necessary to adjust, paying special attention to window 4 – duty cycle ( % ).
The duty cycle ( % ) at idle should not be large, otherwise there may not be enough angle for correction when driving.
A GUIDELINE can be the numbers in the LATE position = 3.0 – 3.5 degrees with a duty cycle of 30-35 %.
-
If the readings in the basic settings of group 04 do not correspond to the guideline, continue the adjustment. If it's okay, exit the basic settings.
-
Go to the MEASUREMENT RESULTS and check the gr. again. 04. We see the following situation there.......
It says that the injection is a bit early, but within tolerance. This situation is normal for this engine, according to external signs, it runs softly, does not growl, as usual with "early".
-
Exit group 04 and then exit the "Measurement Results" function.
-
Turn off the engine.
-
Turn on the ignition and go to the "Fault Memory Content" function.
-
Start checking all the systems of the car.
While the check is going on, and it takes place in automatic mode and it takes a relatively long time, let's move on to assembling mcompartment. -
Assemble in reverse order:
- tighten the camshaft gear bolt (160 Nm) using a torque wrench,
- install the protective cover of the injection pump belt, expansion tank, radiator,
- screw the upper radiator bar, intercooler mount, body trim parts.
- Check the results of checking the errors of all systems on the screen of the device, and if they are detected, delete them.
- Close the diagnostic program and turn off the diagnostic tool.
- Turn off the ignition.
- Disconnect the diagnostic cable. Do not forget to close the cover of the diagnostic connector on the steering column.
Despite the differences and diversity of and VAS diagnostic equipment, all diagnostic and control groups coincide in the measurement, study and processing of data from the blocks of measured quantities and basic settings.
VagCOM owners can be recommended to use the TDI Dating program as a final test of their actions.
In this demo photo, you can see graphically the injection status of your vehicle.
Please note that the program does not work separately, but is an addition to the VagCOM program. The user of this program needs to learn some of the intricacies of starting it and interpreting the results of the injection condition.
I can only point out that due to the inertia of the injection advance valve readings, your graph on the screen may be slightly different from the actual state of the injection angle.
The injection timing is adjusted.
The time of the work is about an hour.
Now you can carry out sea trials: listen to the operation of the engine, evaluate its dynamics and driving characteristics (sluggishness, agility) in different gears.
IMPORTANT WARNING:
Dynamic adjustment results will only be successful if the MECHANICAL PART OF THE ENGINE IS IN ORDER and the timing marks are set correctly.
No adjustments with the help of a computer will correct errors in the mechanics of the engine made when installing timing belts and injection pumps.
If you are not sure about the correct installation of the belts, you should start your search by checking the installation of the marks... How to properly service the timing, here - Replacement of timing belts and injection pumps on Volkswagen Transporter T4 - ACV 2.5 TDI engine (rus.) :hat:
P.S. from Admin - report added to the site:
Dynamic injection timing adjustment on VW Transporter T4, Caravelle, Multivan - ACV 2.5 TDI engine (rus.)
Thank you! :thankyou2: :hat:
engine maintenance, head repair, diagnostics
tel./Viber +38050-750-06-30 - Sergey
Thank you! Reactions:Alexei sedoi, CemCem, alex_laboratory and 48 others
If, in addition to adjusting the fuel injection angle, you are also interested in DIAGNOSTICS of all engine electronics systems, then I suggest you familiarize yourself with the table.
I called it "Table of Primary Diagnostics of a Diesel Car".
I developed the table myself and have been using it for more than a year. When analysing measurement results, it is necessary to useIn the case of the United States of America, the United States of America and the United States of America and the Therefore, in my opinion, it is very convenient when all the data is in front of your eyes, in one place.
It has already been adopted by many diagnosticians and car enthusiasts.
A car owner can fill in the table "by hand" without having any diagnostic equipment.
If you have problems with the engine and visit the service, you just need to write down this data with the diagnostician (motorist), filling in the appropriate columns.
The table is a schematic copy of the COM groups.
The groups are filled vertically, and the five columns in each group are provided for troubleshooting statistics.
Groups marked in RED are required for checking, especially in cases of problems: "does not drive", "dull", "smokes", etc.
Replacement of timing belts and injection pumps
https://vwts.ru/articles/engine/acv_zamena_grm.html
MOTOR parts
https://vwts.ru/articles/engine/acv_remont_gbc.html
VW Caravelle T4 rear wheel bearing replacement
https://vwts.ru/forum/topic/236853/
Multimanual
https://m.vk.com/photo-13612533_456240310?reply=23801
VAN WEZEL Podélný nosník VAW 5874360, 5874360 -
701803706B

VAN WEZEL Podélný nosník VAW 5874359, 5874359 - 701803705B (2 189,-)

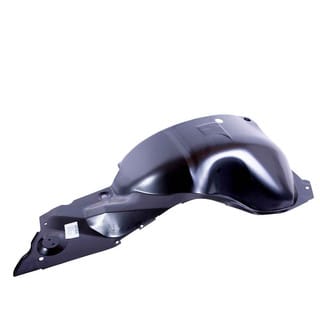
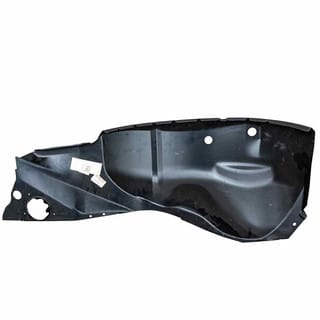
Wheel Housing Side Panel
Part Number: 7D0801244B
Supersession(s): 701801244; 701801244C; 7D0-801-244-B
https://parts.vw.com/p/Volkswagen__/Wheel-Housing-Side-Panel/49106246/7D0801244B.html
https://allegro.cz/nabidka/repertoar-blatniku-podbehu-kol-predni-vw-t4-90-03-l-p-7975492244
https://allegro.cz/nabidka/repertoar-blatniku-podbehu-kol-predni-vw-t4-90-03le-7975484694
SKU 956601-6 956602-6 - 1657,-CZK
502,11 Kč *2

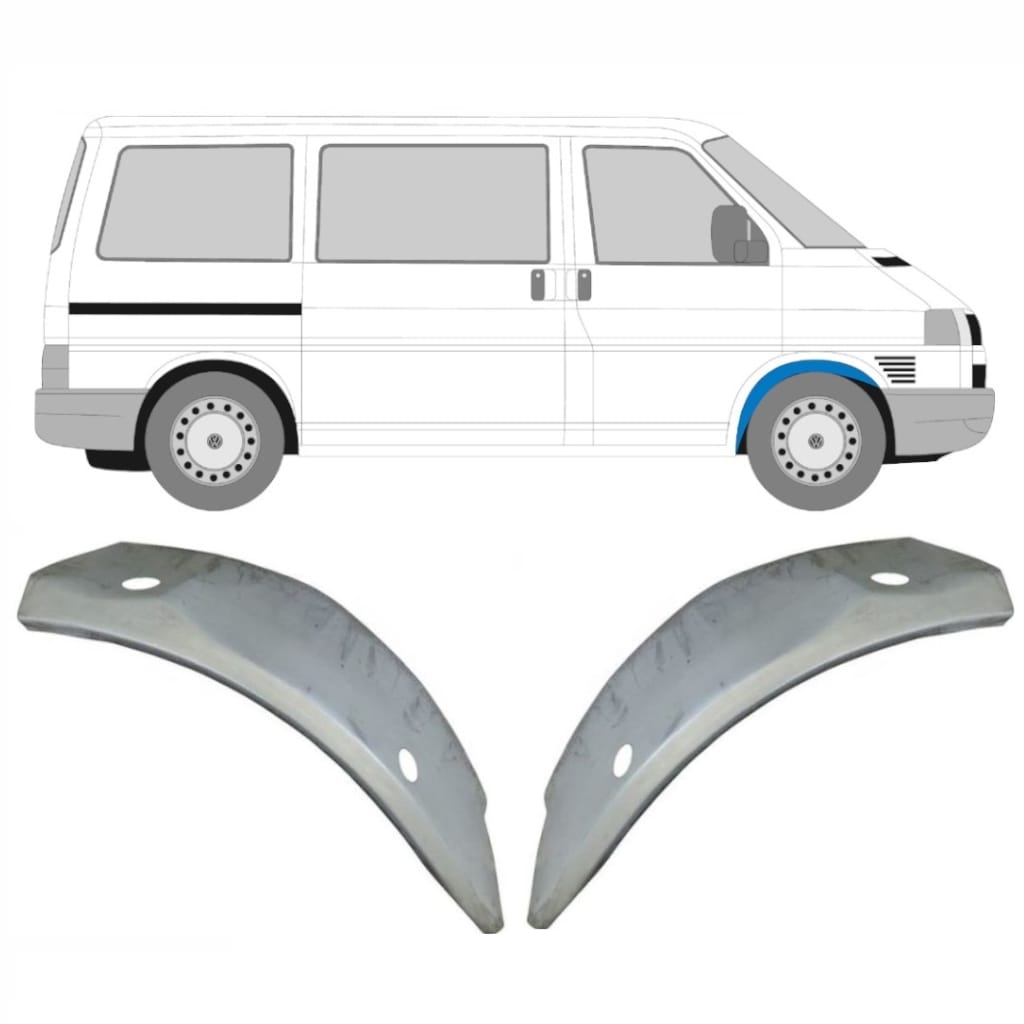
https://bus-ok.nl/T4-Wheel-housing-Genuine-Volkswagen-Part-OE-Nr-701801243C
https://bus-ok.nl/T4-wheel-houseing-right-front-orig-VW-OEM-partnr-7D0801244-B
T4 wheel houseing right front, orig. VW, OEM partnr. 7D0801244 B
T4 Wheel housing Genuine Volkswagen Part OE-Nr. 701801243C